
Understanding File Attachments in Google Classroom
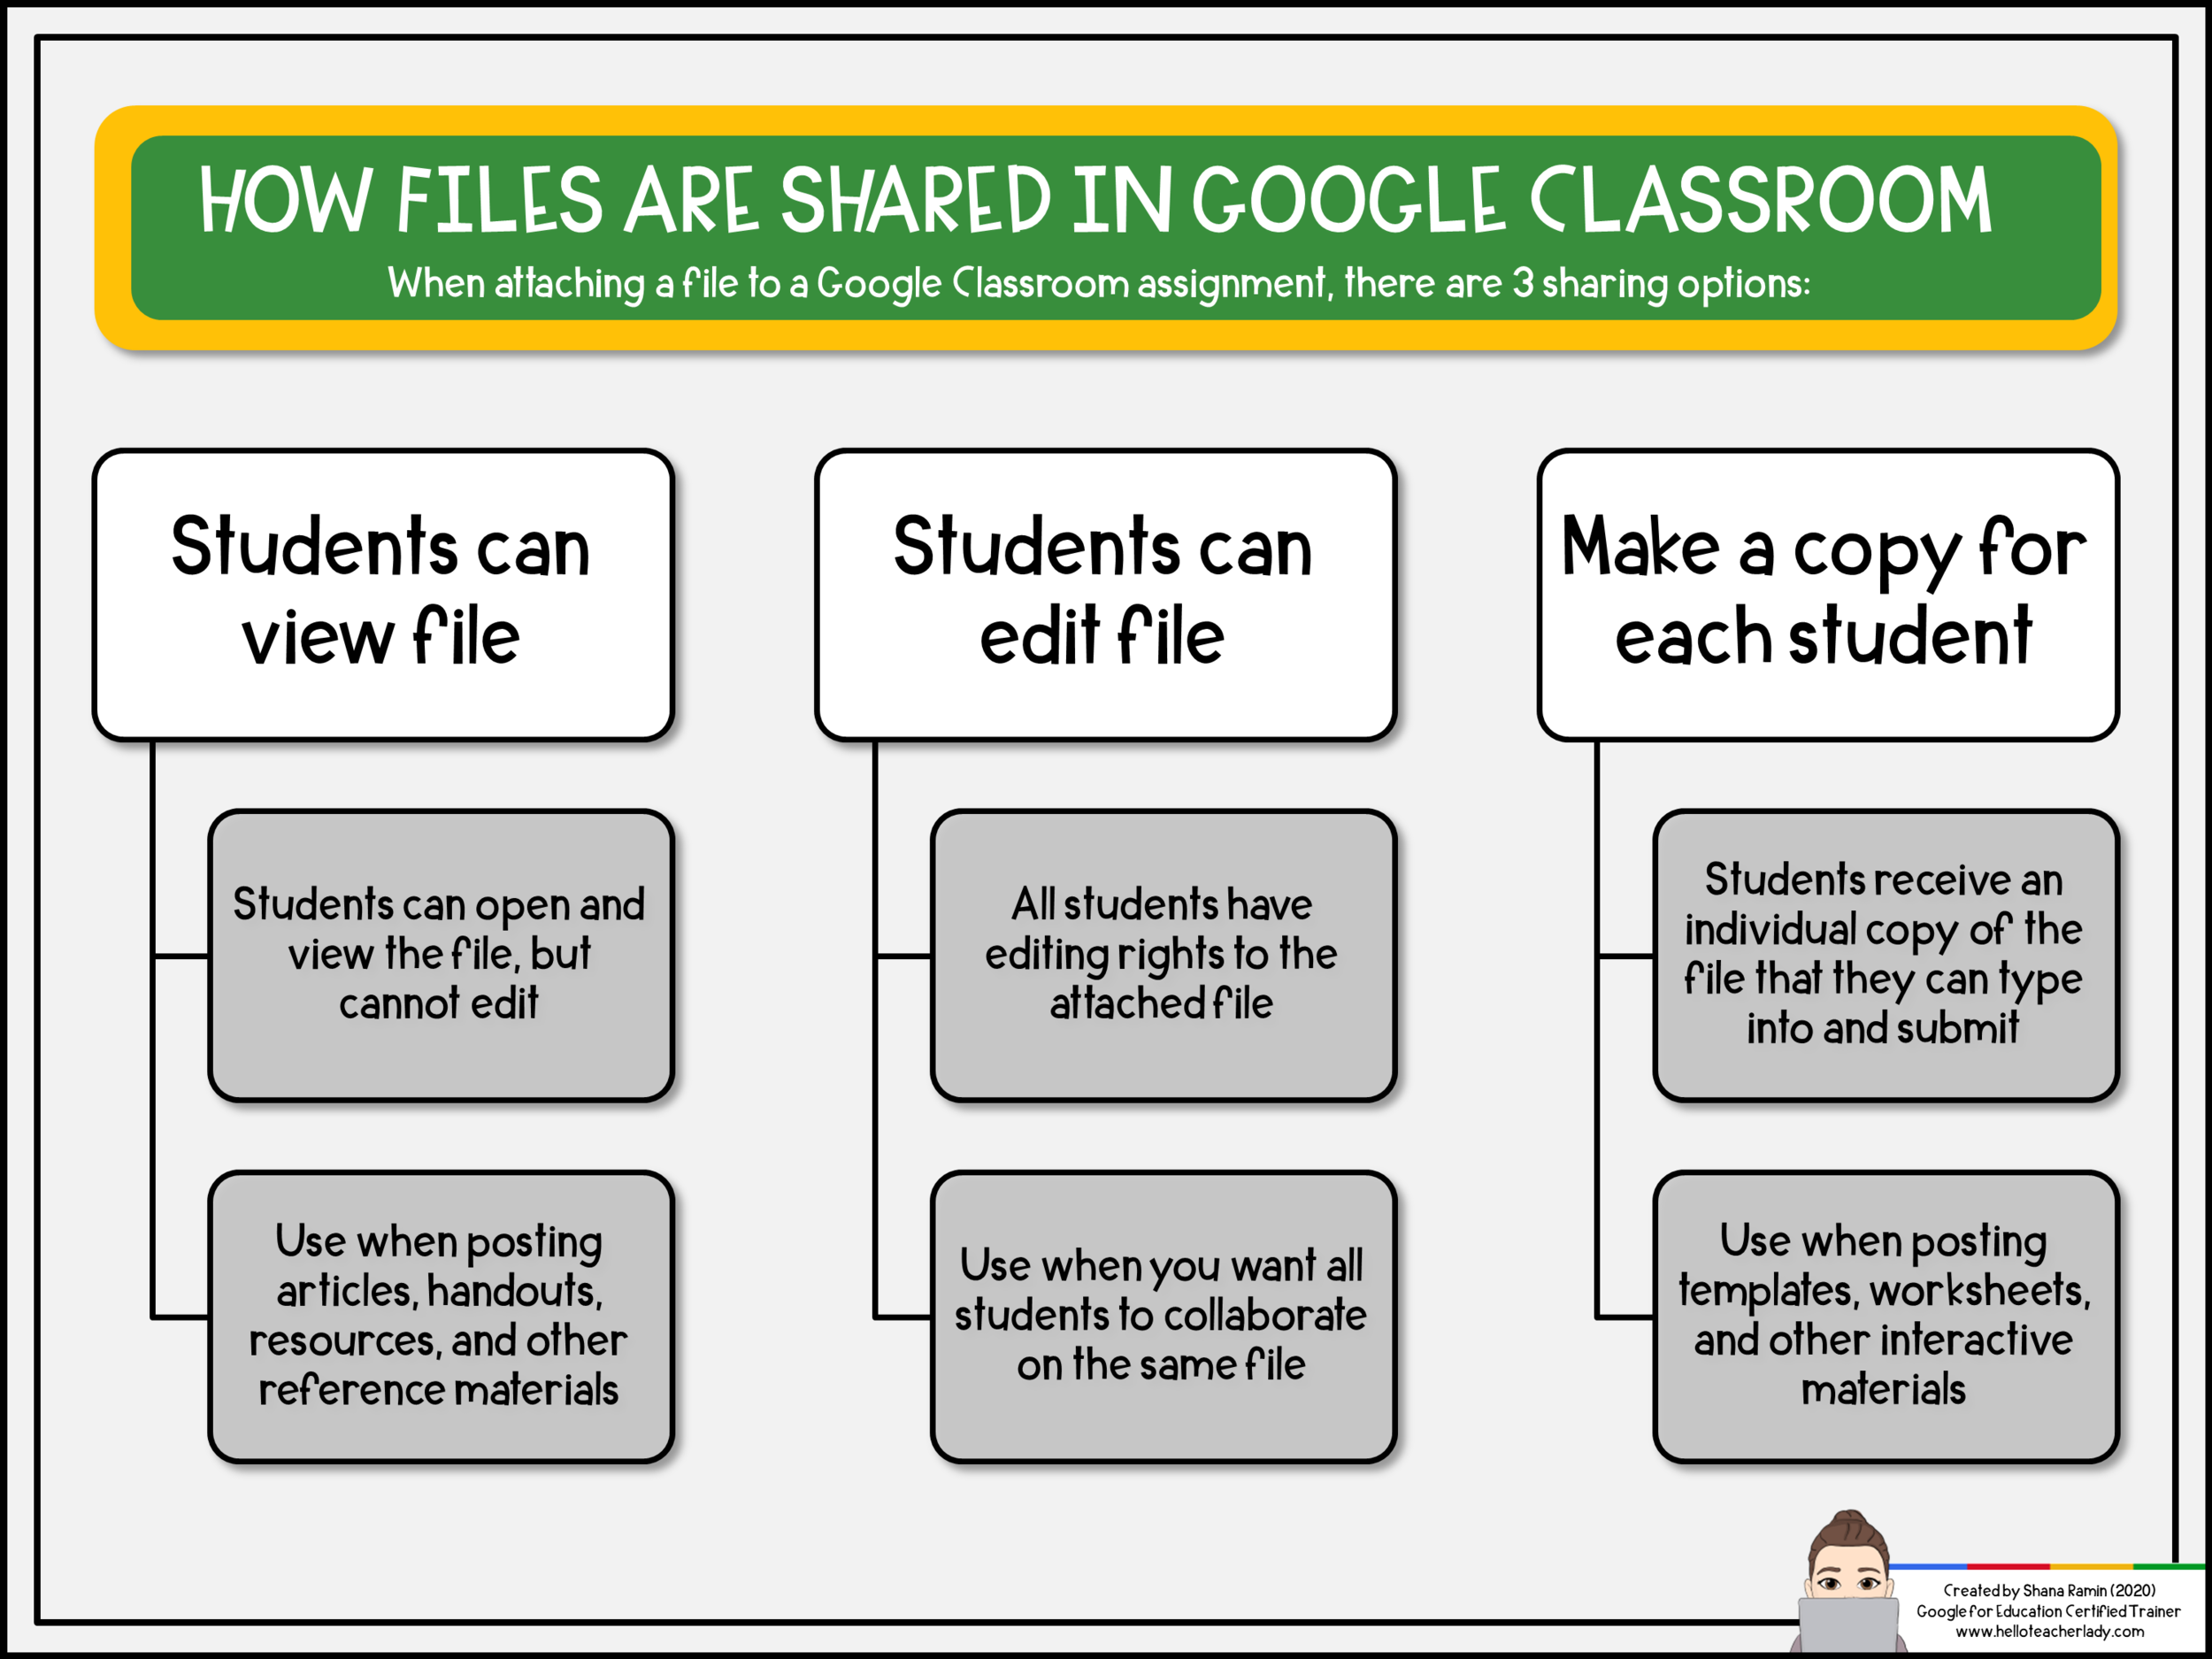
When you attach a file to an assignment in Google Classroom, there are three options you can choose from: Students can view file, Students can edit file, and Make a copy for each student. These settings dictate how students can interact with the file once the assignment is posted.
Here’s a breakdown of how and when to use each option, along with a few quick tips (of course).
🔎 Students can view file
Students can view file is the default setting for Google Classroom attachments. This means that unless you specifically select one of the other options, your attachment will post as a view-only file. In view-only, students will be able to open and view the attached file, but they will not be able to make any changes.
Use this setting when posting articles, handouts, and other reference materials. Basically, if students only need to see the file (but not type on it), this is likely the setting you’ll want.
Quick Tip 💡
When students open attachments in Google Classroom, those attachments are automatically added to the “Shared with Me” section of their Google Drive. Students can then access these files anytime without having to go through Google Classroom first. Think of it like a digital resource they’ll never lose!
For example, when we write our first essay at the beginning of the year, I always post a quick screen recording where I demonstrate how to format a doc in MLA. Once a student opens the video, they can find it again later simply by typing “MLA Format” (key words from the video title) into their Google Drive search. I’ve had former students visit and tell me that they still use some of the resources I posted, which is pretty neat.
Related:
Learn more about using the advanced search features in Google Drive.
Learn how to save individual pages of a PDF to share with students in Google Classroom.
🖊️ Students can edit file
Use Students can edit file when you want all students to have editing access to the same document. This option is ideal for collaborative work, such as group brainstorming sessions, collaborative slideshows, and sign up sheets.
Quick Tip 💡
Use this setting with caution. While it can be a great tool for collaboration, it is NOT the setting you want for posting individual assignments. If you want each student to have their own copy of a file to edit, you’ll want to use Make a copy for each student instead.
It’s also important to note that since this setting allows students to make direct changes to the attached file, you’ll probably want to make a copy of the original before posting. You can always revert back to the original file in the revision history if needed, but making a quick copy would save you that step.
📁 Make a copy for each student
The Make a copy for each student setting automatically creates an individual copy of the attached file for every student. The copies are immediately titled with each student’s name and attached as student work to the assignment. Students can then edit and submit their work as usual. Because each file is automatically distributed, teachers can monitor student progress in real-time without relying on students to create or attach their own work.
This setting is ideal for posting templates, worksheets, and other interactive materials.
Quick Tip 💡
This setting only works when initially creating the assignment — you cannot select this option after an assignment has been posted. If you accidentally post a file as View Only, you can either delete the assignment and re-post, or instruct students to make their own copy of the file by going to File —> Make a Copy. Students will need to attach these copies to the assignment on their own.
Related:
What about Google Forms?
The settings above are available when attaching pretty much any file type...except Google Forms. There’s a good reason for that, but it can be a bit confusing at first. If you want each student to have a copy of the Google Form to submit, folks often wonder why the Make a copy option isn’t available when posting.
Here’s why: Making a copy of a Google Form for each student would result in each student being the owner of their own unique form. You would not have access to your students’ responses because they wouldn’t be filling out your form anymore — they’d be filling out theirs.
So, if you want students to fill out a Google Form, simply attach it to the assignment using the Add from Drive icon as you would any other file. By default, the form will post as view-only, and students can open it up and fill it out from there. You can then view all student responses in one place from the Responses tab in the Google Forms editing window.
Quick Tip
If a Google Form is the only file attachment on an assignment, Google Classroom will automatically mark the assignment as done for students once they submit the form.
Related:
Click here to watch a quick video on how to enable automatic email collection on your Google Forms. Then, check out this collection of ways to use Google Forms from Abby (AKA Miss G) here: 15 ways to use Google Forms and 15 (more) ways to use Google Forms.