How to Annotate Student Work in the Google Classroom iPad App
If you’ve been following me or this blog for a while, you may know I’m a big fan of digital feedback. I adore the Comment feature in Google Docs, and the Google Classroom comment bank has been my MVP since the feature was first introduced by Google a few years ago.
But I have a confession: I still sometimes miss grabbing my trusty lavender flair pen and writing directly on student work. What can I say — we English teachers love our flair pens.
Lucky for us, the Google Classroom app offers a bit of a compromise. When you open a Google Doc attachment in the Google Classroom app, you can actually write on it directly using a variety of annotation tools.
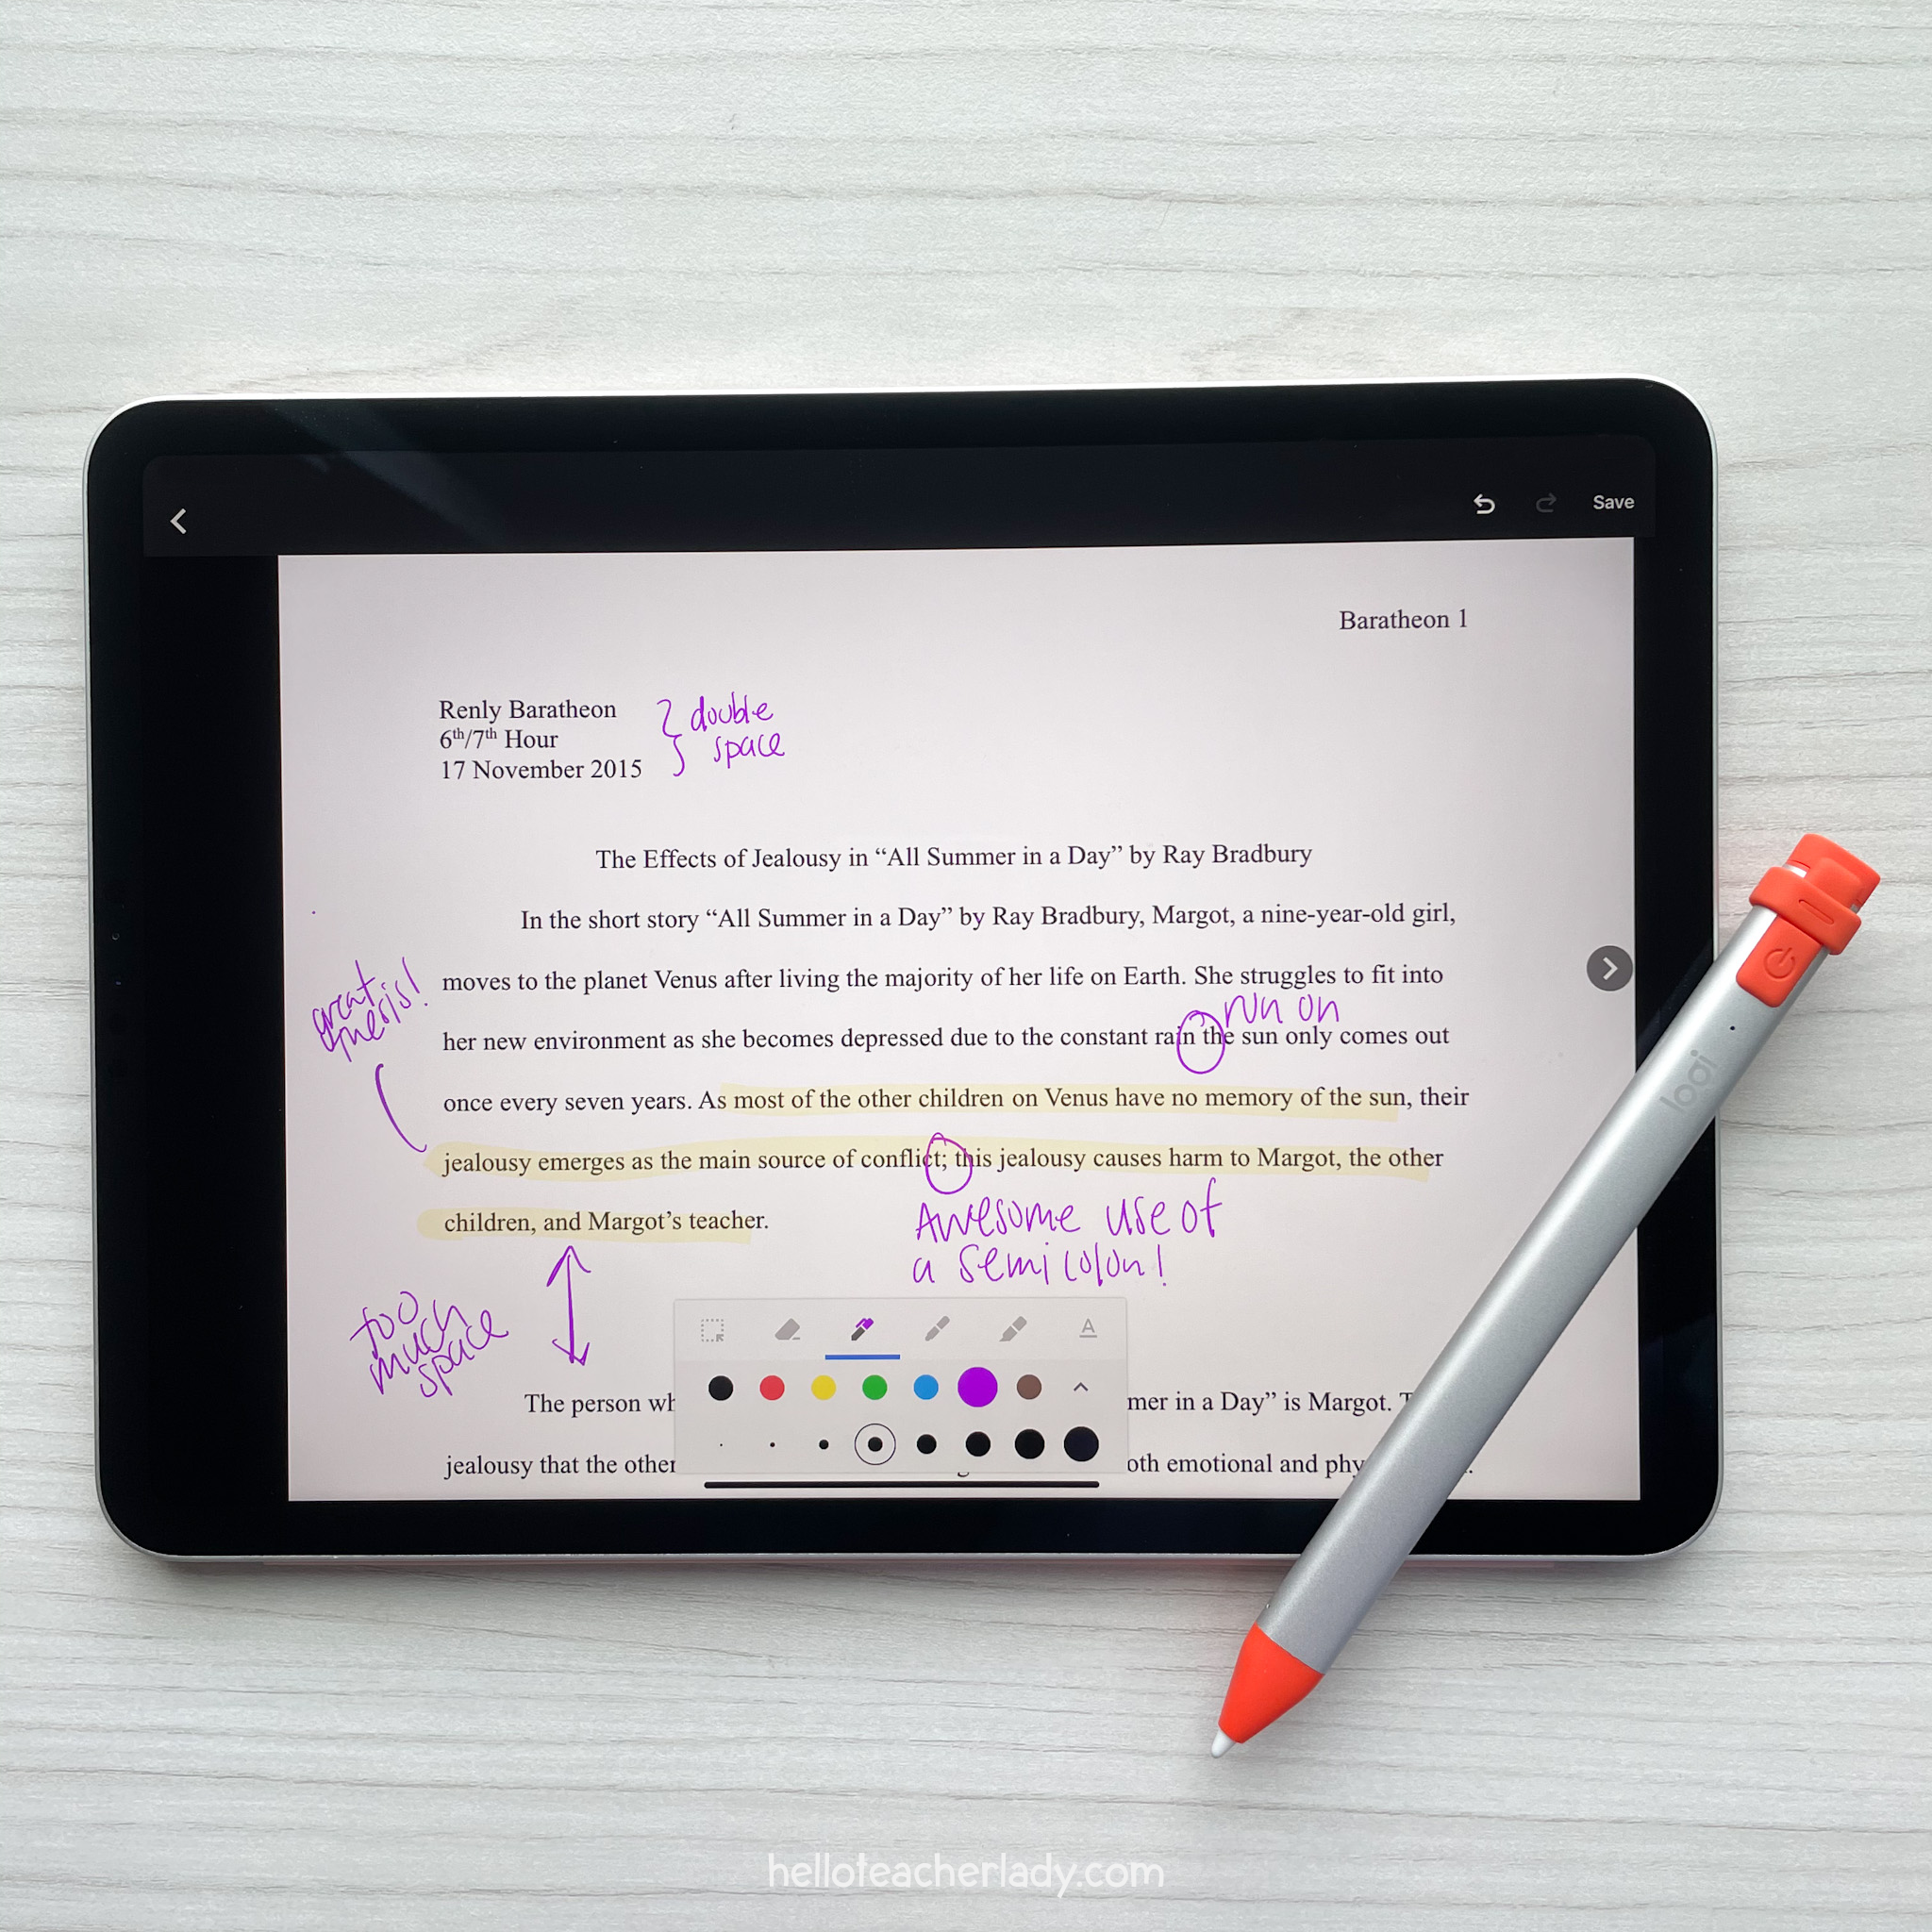
It’s a super helpful, yet little-known feature that combines the traditional feel of pen-and-paper feedback with the digital power of Google Docs and Classroom. I’ve partnered with Logitech to show you how it works.
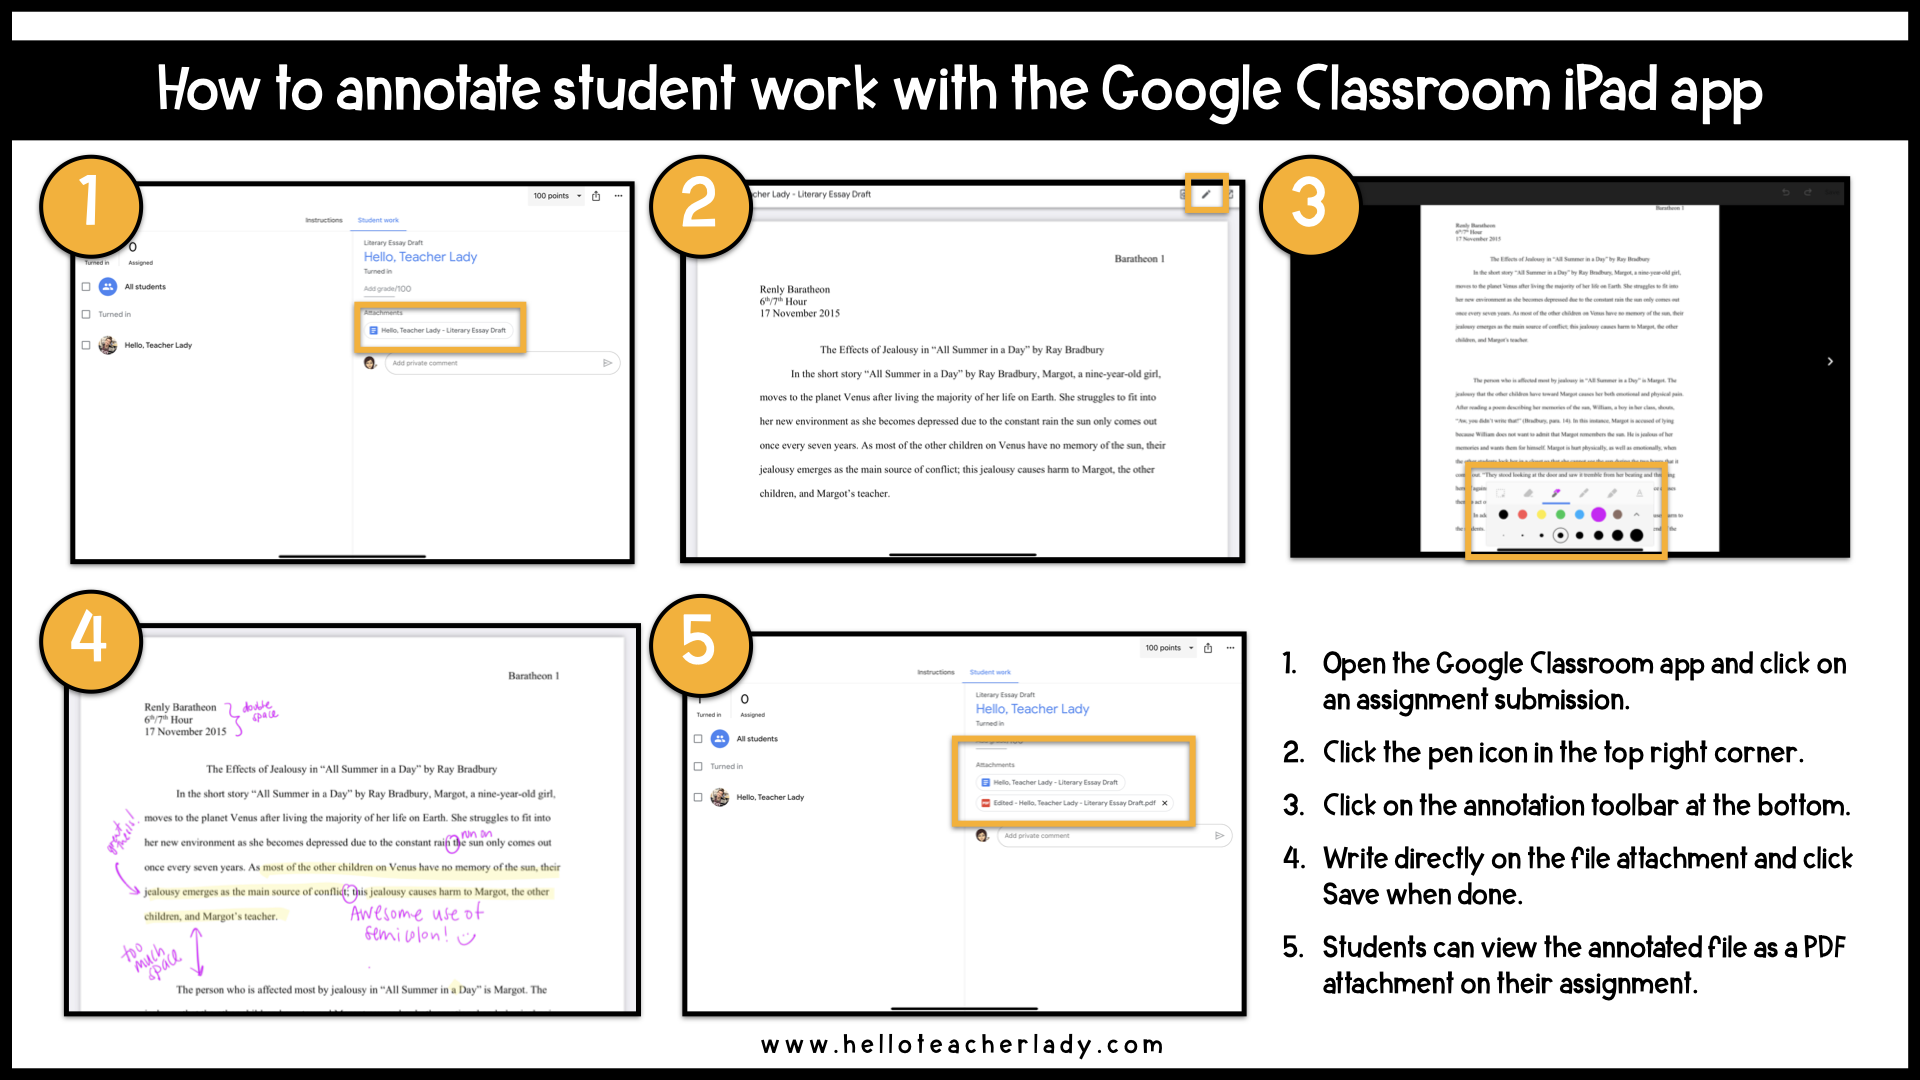
How to write on student work in the Google Classroom iPad app:
Step 1: Open the Google Classroom app and click on an assignment submission.
Step 2: Click the pen icon in the top right corner.
Step 3: Click the annotation toolbar at the bottom of the screen.

Step 4: Use your trusty stylus (shoutout to the Logitech Crayon I’m using here) to draw directly on the attachment. You can write in various thicknesses and colors using the marker, pen, and/or highlighter tools.
Step 5: Click Save when done. Students will be able to view the annotated file as a PDF attachment to the same assignment.
And that’s it! If you’re a Google Classroom user with an iPad, you’ll definitely want to give this a try.
Click here to learn more about the Logitech Crayon. It’s a high-quality, yet super affordable alternative to the Apple Pencil that works with all compatible iPad models (2018 or later).
One last thing...

One of the most common questions I get when discussing digital feedback is, “But how do you get the kids to actually look at the feedback?”
That’s a good question, and I definitely don’t have any magical answers. But here’s something that has definitely helped: student conferences.
Whenever students are working on a lengthy writing assignment, I post an assignment in Google Classroom and make sure students create or attach their Google Doc from there. This gives me access to their work so I can give feedback throughout the process rather than waiting until the very end. Then, I make it a point to review feedback with each student individually before the due date. I’ll generally schedule these mini-conferences over the span of a couple class periods while students are working independently on a revision checklist. This helps guarantee that students not only see the feedback, but also that they have time to actually do something with it.
Thanks to my trusty Blue Microphone Snowball iCE, I can continue conferring with students virtually without worrying about being heard or understood. The built-in mic on my computer had a tendency to muffle my voice and pick up lots of background noise. From a student perspective, this can be frustrating and distracting — especially when students are already dealing with their own background noise and distractions at home. Improving the quality of my mic was one of those small tweaks that made a big difference overall.